Two-Tier Architecture Deployment on AWS using AWS CloudFormation
Hello Everyone👋, In this blog, we are going to deploy a highly available and fault-tolerant two-tier architecture using AWS CloudFormation. First, we are going to understand how our architecture is going to be. Then, we are going to deploy our two-tier architecture from scratch to end. Finally, when we are done with our resource validation and architecture validation, we are going to delete the resources we deployed. I will share my repository link for the CloudFormation template at the end of this blog. You can star it or you can also fork it for modifying template as per your need.
Architecture Overview:
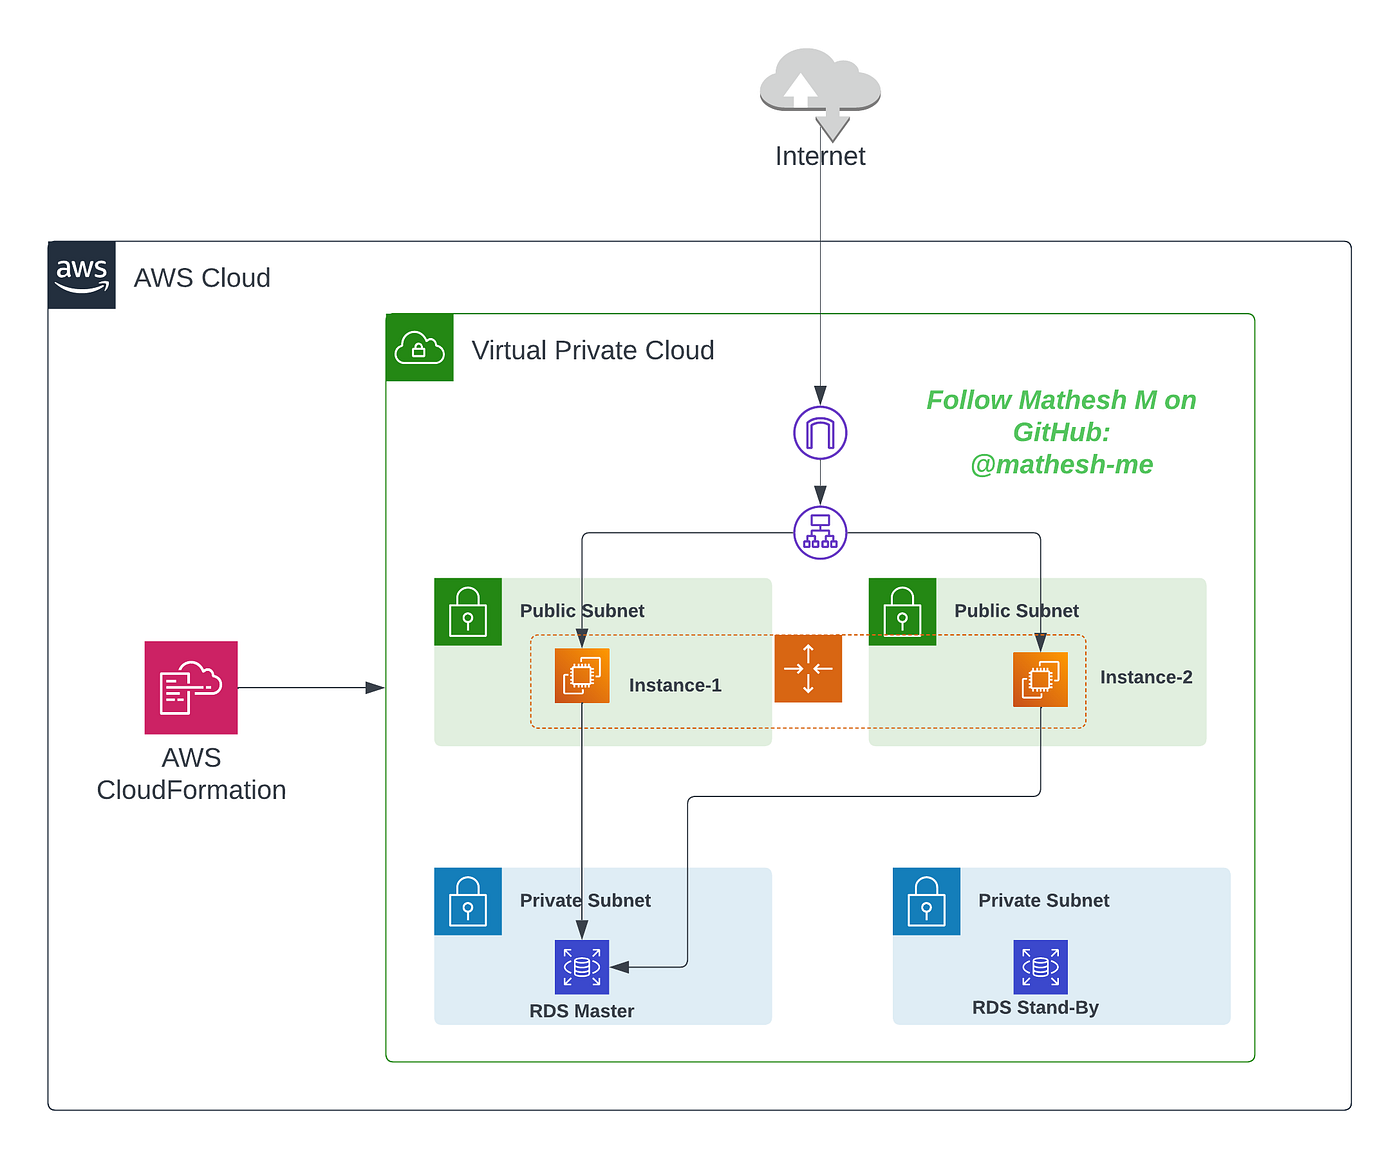
The architecture will consists of a web server and a database server. The web server will be hosted on an EC2 instance and the database server will be hosted on an RDS instance. We are going to create a Separate VPC for this architecture. The VPC will have 2 public subnets and 2 private subnets. The web server will be hosted on the public subnet and the database server will be hosted on the private subnet. The EC2 instance will be launched in an AutoScaling Group. The AutoScaling Group will have a minimum of 2 instances and a maximum of 4 instances. The AutoScaling Group will be behind an Application Load Balancer. The RDS instance will be a Multi-AZ deployment.
Architecture Diagram
Steps:
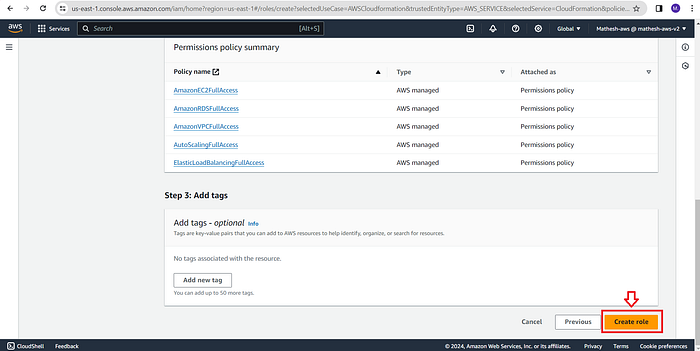
Step-1: Creating a IAM role for CloudFormation to Deploy Resources
In this step, we are going to create an IAM role for CloudFormation to deploy resources. This role will have the necessary permissions to deploy resources in our AWS account.
Follow the below steps to create an IAM role for CloudFormation:
Search for the below Policies
Step-2: Create a YAML template for deploying our Architecture
In this step, we are going to create a YAML template for deploying our two-tier architecture. The YAML template will consist of the following resources:
- You can Download the YAML template from the repository.
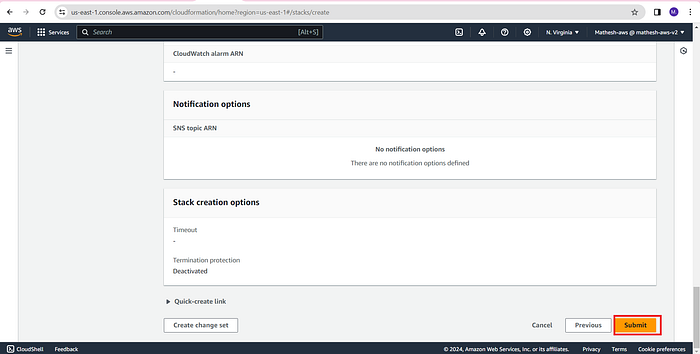
Step-3: Create a CloudFormation Stack to Deploy Resources
Follow the below steps to create a CloudFormation Stack to deploy resources in your AWS account:
Don’t forget to review the Parameters Once and Modify them as per your needs.
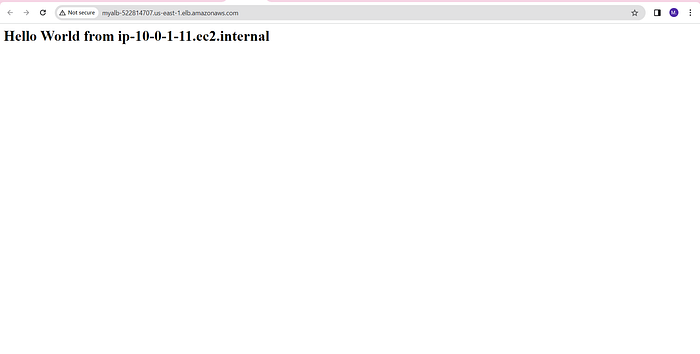
Step-4: Validate our Architecture and it’s Working
- Verify your work by Checking the CloudFormation Stack Events.
- Check the Resources created by the CloudFormation Stack.
- Test the Architecture by accessing the Web Server URL.
- You can get the URL by accessing Outputs Section. In our case ALB’s DNS name is our URL.
Step-5: Delete the CloudFormation Stack to Delete Resources
- Go to the AWS Management Console and navigate to the CloudFormation service.
- Select the Stack that you want to delete.
- Click on the
Deletebutton. - Click on
Delete Stackin the confirmation dialog box. - The Stack will be deleted and all the resources created by the Stack will be deleted.
Now that we’ve successfully deployed a highly available two-tier architecture on AWS using AWS CloudFormation.
I won’t be able to explain each line of code due to its length exceeding 300+ lines. However, I encourage you to go through the code yourself it will be easily understandable. If you encounter any doubts regarding specific lines or resources, feel free to reach out to me on LinkedIn or leave a comment below, and I’ll be assist you with that.
Here’s a brief explanation of the CloudFormation template I’ve created:
I designed it with the intention of sharing it with others, so you can readily use my template without any modifications except for the AMI-ID, DB Username, and DB Password. Most of the template’s inputs are taken as parameters, which you need to provide in the Parameters section.
For many parameters, default values have already been provided by me, It allowing you to focus only on the most user-specific values. Additionally, I’ve created mappings for instance types. The instance type will automatically change (e.g., t2.micro, t2.medium, t2.large) based on the value you provide for the Environment parameter (dev, qa, prod).
I recommend that everyone review the values of these parameters: AMI-ID, DB Username, DB Password, instance type, key pair, region, availability zones, VPC CIDR, and subnet CIDR. Once you’ve reviewed these, you can proceed with your deployment. That’s all for now, and you’re ready to start your deployment journey.
Repository Link: Click here
Refer AWS Official Docs for Templates Syntax: https://docs.aws.amazon.com/AWSCloudFormation/latest/UserGuide/aws-template-resource-type-ref.html
👏 If you find this helpful, don’t forget to give claps and follow my profile. I’ll be sharing more projects and ideas about Cloud and DevOps. If you have any doubts, feel free to comment or message me on LinkedIn.
If you want some project ideas on AWS, consider the article below.
Let’s Connect on LinkedIn: LinkedIn Profile
Explore Hands-On Projects: My GitHub Account